South Coast Sailboats
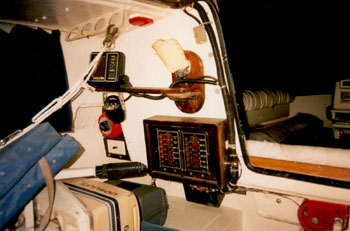
120V (AC) switch & 12V Battery
charger, 4 Deep Cycle Marine batteries
The 120V line that goes to the duplex box
mounted up in the battery compartment in the bow, is switched
by a standard wall switch mounted below the final battery switch.
There are three of these battery switches. The other two are mounted
in one of the starboard cabinets under the bunk on that side.
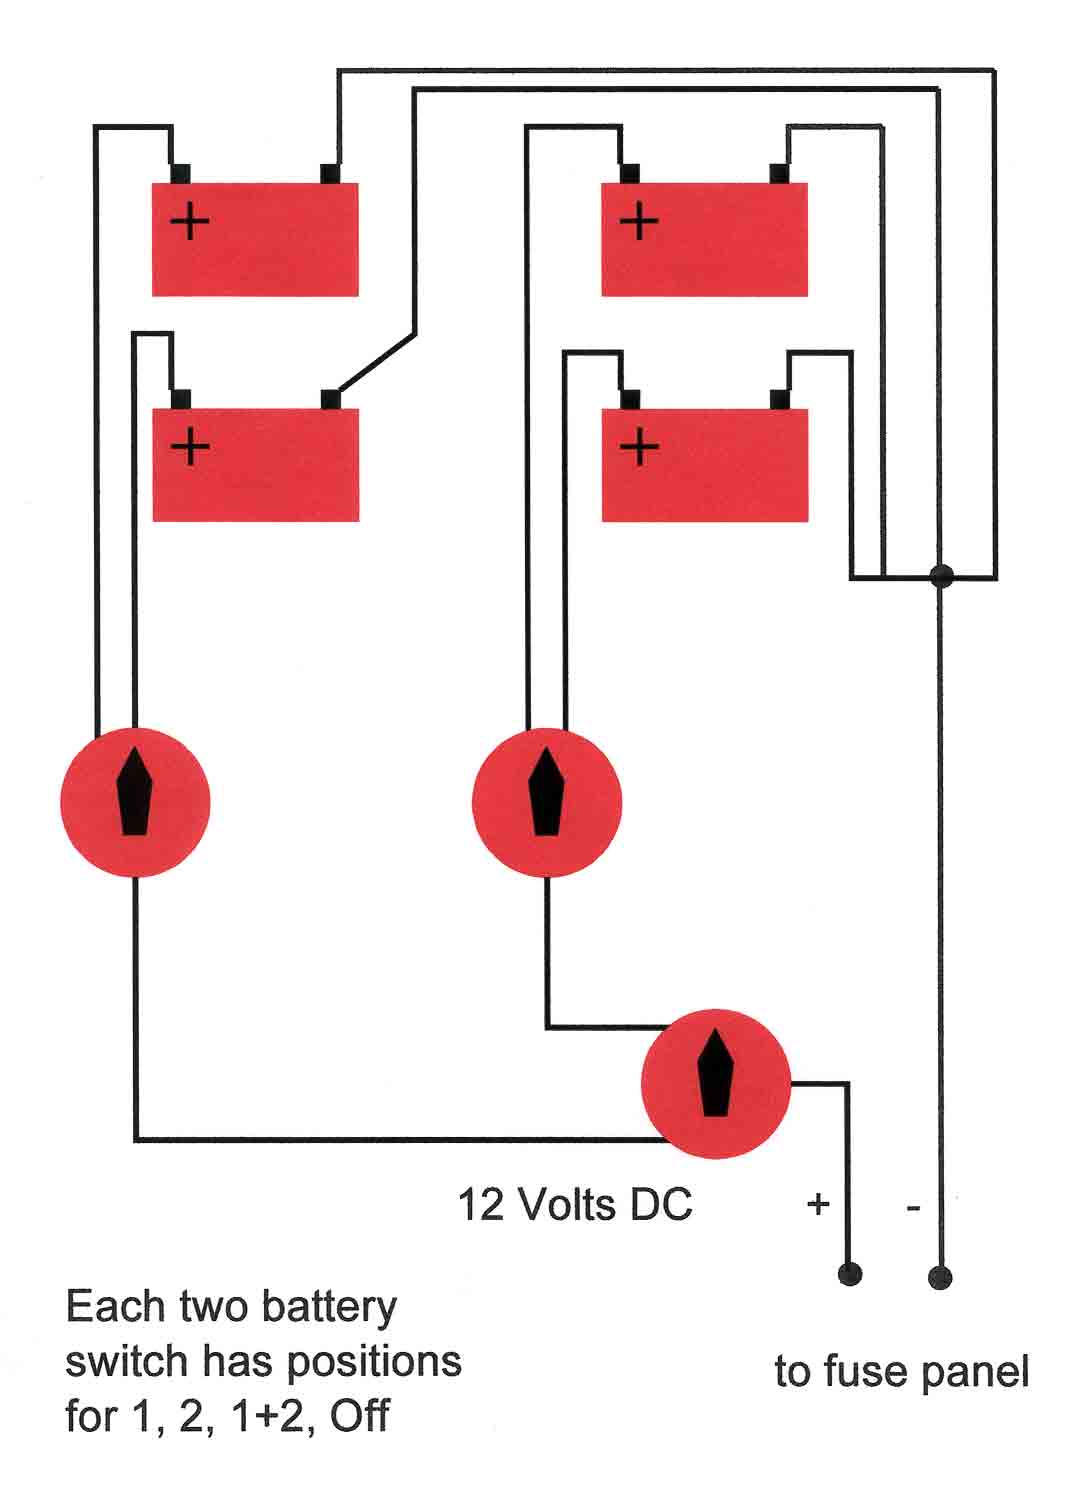
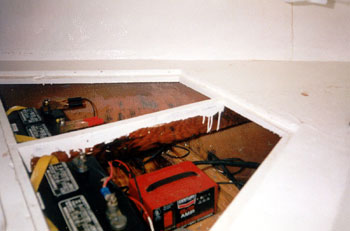
The way it works goes like this. Two batteries are mounted on
the port side of the battery compartment. Two batteries are mounted
on the starboard side of the battery compartment. There is one
switch for each pair of batteries. This brings four batteries
down to two circuits. The final battery switch mounted next to
the control panel, brings the two circuits down to a single feed.
This allows us to feed off of any single battery or any other
combination. This works extremely well since our system is a straight
discharge type with no means of charging while under way. As a
big bonus, this also allows you to charge the batteries in pairs
while being off line from the 12V circuit being used on the boat
while charging discharged batteries.
Another point of information, when we carry
four batteries up in the nose of the boat, this goes a long way
to counter-balancing the heavy weight carried in the stern. If
the water tank (that is no longer there) carried 12 gallons of
water at 8 pounds per gallon, that would be 96 pounds of weight
placed all the way up in the nose to counter-balance the heavy
weight carried in the stern. Well, my stern is a little heavier
than your average South Coast Sailboat, so, 4 - 12V deep cycle
batteries at maybe 35-40 pounds apiece would add up to a maximum
of about 160 pounds. This went a long way to rebalancing the boat
so it does not drag its tail deep in the water like it used to.
I never used that old water tank anyway, and it was always empty,
therefore this was the reason that my boat used to be such a tail
dragger. All that weight is mounted up where the water tank used
to be. This helps even out the weight (from front to back. As
a result, when sitting at the mooring, the stern usually hangs
out of the water by only about 1". This then drops back down
and in the water when we climb on board. This is a major plus.
Before the big rebuild, I used to have in the back of the boat,
2-6 gallon gas tanks, two batteries, 1 6 hp Johnson motor, 1 anchor,
plus any other equipment that I might have been storing under
the floor or in the cotpit lockers, and all that was before 2-3
or 4 husky guys would climb into the cotpit. not wonder this boat
used to be such a tail dragger
I have been fighting the corrosion thing for
many years and when it comes to electrical systems, I have figured
out a thing or two.
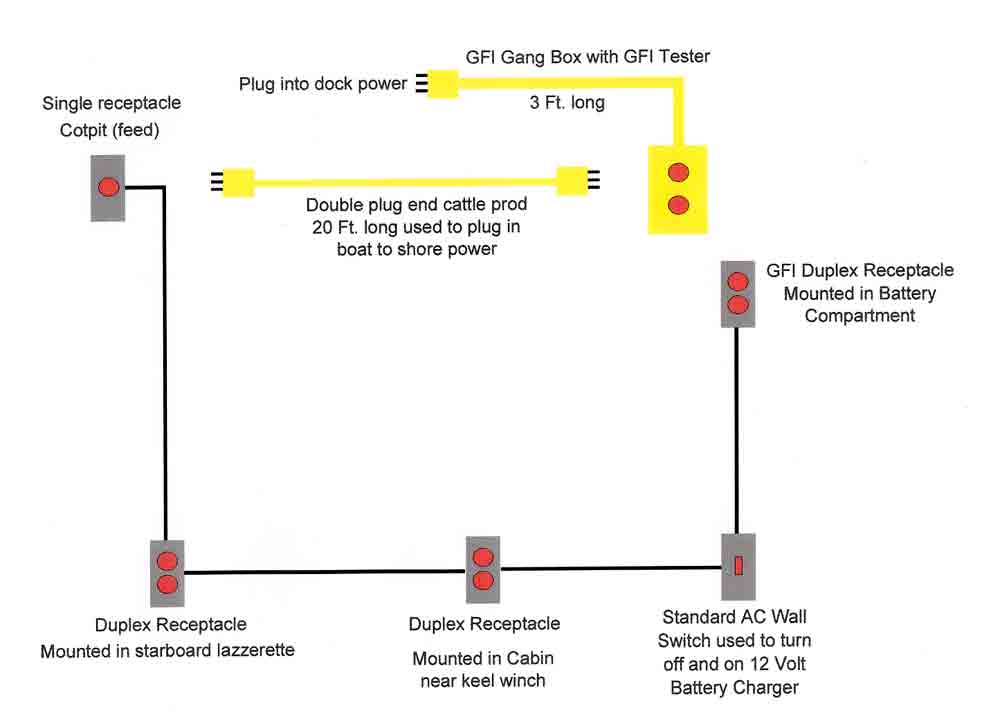
Some insights: When wiring in your shore power
systems consider the following:
First for my wire, yes it is braided or mulitstrand
wire (#14-2 with a separate insulated ground wire). This is wire
meant for industrial grade extension cords. I like multistranded
wire much more than solid wire (even in lighter wire) because
it is more flexible, not prone to snap or break where kinked.
It also when setup properly, will last for many years without
degrading and corroding. All my AC wiring is made from this same
type of wire. I used this for "the cattle prod" line,
as well as for box to box wiring.
Second, the boxes I used were simply outdoor
grade with rubber seals and snap over covers. In the two positions
where I was not using special boxes, they are standard galvanized
metal boxes with Stainless Steel cover plates.
Third, all connections with or without metal
crimp on connectors should be coated, dipped or otherwise impregnated
with something called No-Lox. No-Lox can be purchased at any electrical
supplier as well as Home Depot. It is non-conductive, and is similar
in appearance to automotive grease on color and consistence. It
prevents the air and moisture from making it's way up into the
mulitstranded wire. Cover the wire with No-Lox before adding a
crimp connector, and also brush on more over screw down connections.
By giving the wire ends a decent air/water seal, the corrosion
is stopped before it can start. This is also a very good idea
for the battery terminals.
Also, in place of metal boxes, you might consider
the current crop of plastic boxes. They are of reasonable quality,
won't rust, and should provide good long-term service.
To answer a specific question, why not wire
directly to the boat? The simplest answer is for flexibility.
I keep my boat in tidal waters (at QCYC tides rise and fall 7-10
feet, in can simply disconnect (it has give). I also like being
able to coil up the line and store it way when it is not being
used. The double plug line allows for very easy hookups with a
minimum of fuss and bother.
Click on any image to look at
a larger image
V-Berth Issue - Get out your saw!
If you started cutting, I will tell you what
you will find. Not much! There was and still is a center rib which
I retained. The rest of the area was occupied by a twelve gallon
water
tank made of fiberglass, fiber glassed in place, and a couple
of pieces of foam block. Hardly enough to provide any flotation
at all in a bad situation. On my boat there was a small access
panel in the top of the v-berth to access the water tank for the
purpose of filling the tank. I just took the liberty to make the
opening much larger, and then just adding some wood around the
edges to provide support for the new panel to rest upon when in
place. I my case, after cutting the top opening much larger,
I than went about removing the water tank. I cut this out with
a grinder. Piece after piece, until I had removed the front, back
and top walls of the tank. I then grinded it back to the cloth
which comprised the inner hull. At that point, I had a single
center rib, and an open hull compartment the shape of the inner
bow.
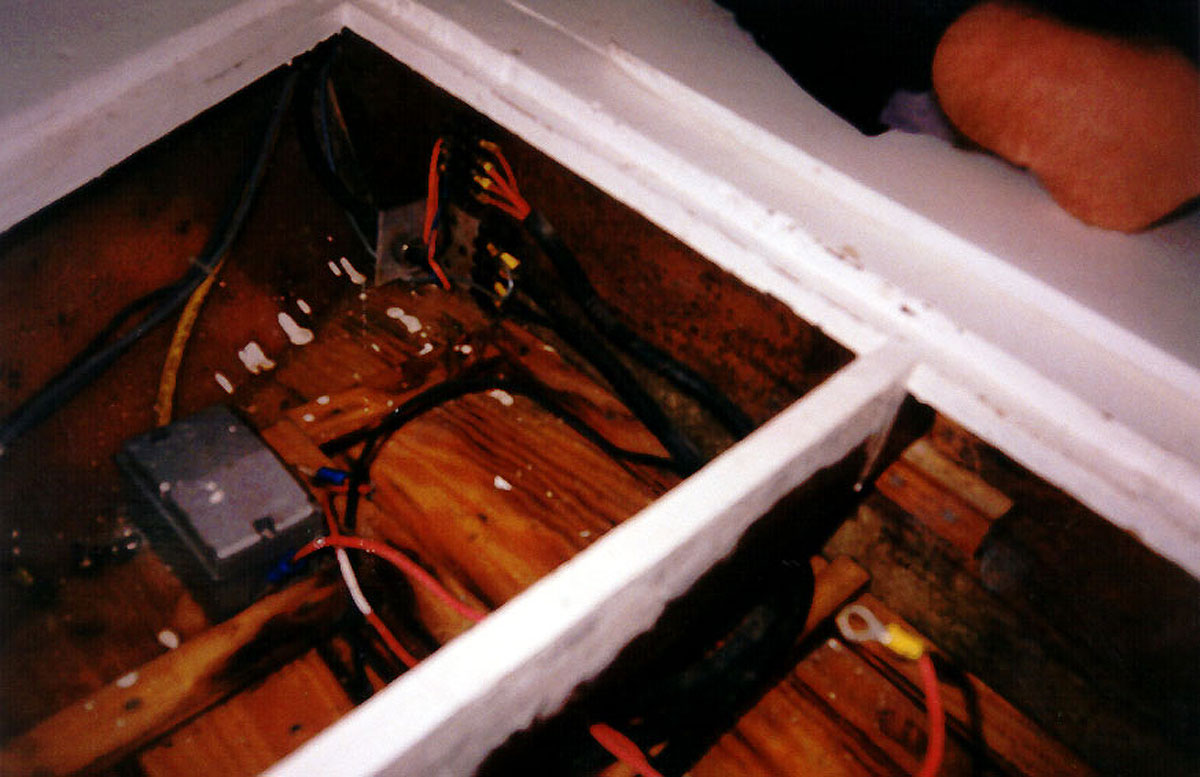
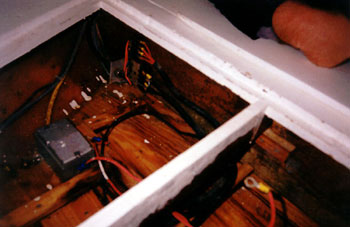
After getting to this point (which was very
easy), I then went about templeting the base of the battery tray,
installed a structural rib across the back for the base to be
attached to, cut out the base tray, screwed it in place, and then
proceeded to glass the shit out of it (attaching the base to the
hull along both sides of the "V". This was also very
easy, but time consuming and messy. Once glassed in I took a swat
or two at it with the grinder just to tune up the fiberglass,
and then hit it again with one last coat of glass.
After this, all I had to do was add a couple
of ribs to locate the batteries, add a 120 V AC GFI Duplex outlet
in an outdoor weatherproof housing, and the battery wires. To
take 4 batteries down to one feed, I used three dual battery switches
(Switch 1 - left side 1 & 2, Switch 2 - right side 1 &
2, then Switch 3 - Left side & Right Side down to one single
feed. This arrangement allows me to couple batteries for output,
or charging. I only charge up twice a season. I normally charge
two batteries at a time, set up with two chargers; I charge all
four batteries at the same time.